June 30, 2011
Embroidery Headband
Following several months of busyness, I have finally begun to craft again. After reading (well, skimming) Alicia Paulson's book, Embroidery Companion, I was inspired to try my hand at an embroidery headband.
Though a headband is a small accessory, it was by no means a quick project. At least for an inexperienced embroiderer like myself. In the end, the headband turned out much better than I anticipated. I did, however, somewhat alter the original pattern. Obviously the colors are different, but I also changed the style of the flowers.
The most difficult part was finding 'decorative elastic' for the ends of the headband. Having no idea what decorative elastic was did not particularly make my search easy. Finally ended up buying some gorgeous shimmery, blue-green, fold-over elastic from Etsy, and whip stitching it to both ends.
I've also been attempting to make some embroidery bracelets using the same type of elastic. More on that later.
Labels:
books,
embroidery,
photography
June 18, 2011
A Little Light Painting Tutorial
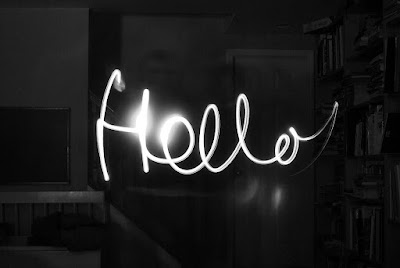
writing with light...
Well, the 'endless creativity' on this blog seems to have stopped dead in its tracks. I'd say it's about time bring some imaginative content to this page. Today's creative endeavor... A light painting tutorial.
You may be wondering - What in the world is light painting? Well, in short, to 'paint' with light, means to point a light source of some sort (a flashlight, for instance) in front of a camera, and then take a photograph with a long shutter speed. To 'paint' with light, you will first need to be in a dark room. (Outdoors at nighttime is preferable. You will get a better background, and light from other parts of your house will not be as distracting.)
Here are some things you will need:
- SLR camera (point and shoot cameras can be used, but some may not be capable of long shutter speeds; certain point and shoot cameras [my old one for instance] have a fireworks setting in which the shutter is open for about 5 seconds. SLRs are still preferable for this activity because the shutter can be opened for an extended amount of time.)
- Some kind of light-shining object i.e. flashlights, glowsticks, plastic lightsabers, Christmas lights [would need extension cord for this], or really any other kind of portable light source.
- Black or dark sheet for background or as prop in the photo (optional)
- White or light sheer for creating a 'ghostly' figure (optional)
- Mirrors for reflecting light (optional)
- Tissue paper or translucent colored plastic (optional.) This is for changing the color of your light, when using a flashlight. To achieve this affect, you simply hold a piece of tissue paper or a piece of see-through plastic over your flashlight (or tape it) while creating you picture. (Note: The little red disc in the photo is just a cheap plastic magnifying glass from a kids meal at a fast food restaurant. Anything like this can be used.)
- Tripod (If you want clear photos, this is mandatory! Hand held light painting works too, but most likely your pictures will be blurry from camera shake.)
- A little creativity (It's the best way to get fantastic photos.)
- Wear black or dark clothing (preferably clothing that does not reflect light.)
- If possible, make sure that light from other areas of your home is not affecting your 'light painting studio.' You want the room (or backyard) as dark as possible. Unless of course you want the 'effect' of other light sources.
- Set your camera on a long shutter speed. Most cameras have a wide range of shutter speeds. You will need to have a capacity of at least 5 seconds. Some cameras have a 'bulb' setting, which means that you can hold down the shutter button for as long as you would like. (Please note that the longer the shutter is open, the longer you will be waiting for your camera to process the photo.)
- Set your aperture. Aperture is a big word for how much light is let into the lens, determining how dark or light your photograph will be. Aperture is measured in 'f-stops,' another odd term. The larger the f-stop, [f-22, for example,] the darker your picture will be. The smaller the f-stop, [f- 3.5, for example] the lighter your picture will be. Most likely you will want to use a larger f-stop.
- Attach the camera to a tripod (unless of course you want to hold the camera, but a tripod is highly recommended.)
This is an example of moving the camera around in circles in front of a stationary light source (kitchen clock)...
A flashlight covered with blue tissue paper...
Patterns of fiery light...
Kid's lightsabers work very well...
This interesting effect was achieved by using a flashlight to trace around someone's feet on the floor, turning off the flashlight as they step and then continuing to trace...
Fun with Christmas lights...
Much of this tutorial is based on the light painting section of the book Photo Jojo. An odd title, but a very fun book, full of creative things to do with photography.
So get out there and discover!
Labels:
light painting,
photography
Subscribe to:
Posts (Atom)